Your NVMe Is Lying to You About Being Fine
NVMe drives don’t tell you they’re throttling. They just quietly drop from 5 GB/s to 1.5 GB/s and let you blame your RAID array, your Ansible playbook, or your own sanity. Meanwhile the drive is sitting at 83°C going “I’m fine, everything’s fine.”
It’s not fine.
PCIe 4.0 drives routinely hit 70 to 85°C under sustained writes in a poorly ventilated case. PCIe 5.0 drives, which were apparently designed by people who hate thermal physics, can breach 90°C in under a minute of sequential writes. When that happens, your drive’s firmware activates thermal throttling and drops write speeds to protect the NAND. On most consumer drives, that means roughly 1/3 of rated speed until temps come down. On a PCIe 5.0 drive, you can go from 10 GB/s to 3 GB/s in about 30 seconds of a dd transfer.
The fix is not complicated. But first, you need to know if you actually have a problem.
Step 1: Check Your Drive Temperature Right Now
If you’re on Linux, you’ve got two good tools: nvme-cli and smartmontools.
# Install if you haven'tsudo apt install nvme-cli smartmontools
# Quick temp check via nvme-clisudo nvme smart-log /dev/nvme0 | grep -i temp
# Full SMART attributessudo smartctl -A /dev/nvme0
The output from smart-log will show you temperature in Celsius. Under idle or light load, anything under 45°C is great. 45 to 55°C is normal. Above 60°C at idle means your airflow situation is grim and you haven’t even stressed it yet.
For a continuous temperature monitor while you’re doing other things:
# Watch temp every 2 secondswatch -n 2 'sudo nvme smart-log /dev/nvme0 | grep -i temp'Or if you want a broader system view alongside CPU temps:
sudo sensorsMost motherboards report NVMe temps through the nvme-pci-* sensor. If yours doesn’t, stick with nvme-cli.
Step 2: Provoke the Throttle (So You Know It’s Real)
Checking idle temps is fine, but the problem shows up under sustained writes. If you’re copying large VM images, running a backup job, or doing anything with sequential writes for more than a few seconds, that’s when throttling kicks in.
The fastest way to trigger it on purpose is fio:
sudo apt install fio
# Sustained sequential write — runs for 60 seconds# Note: /dev/nvme0n1 is the block device (the namespace).# /dev/nvme0 is the controller — that's what smart-log targets, not fio.sudo fio --name=thermal-stress \  --filename=/dev/nvme0n1 \  --rw=write \  --bs=128k \  --ioengine=libaio \  --iodepth=32 \  --size=20G \  --direct=1 \  --runtime=60 \  --time_based \  --output-format=terse
Warning: This writes directly to the block device. Make sure you’re targeting the right device and there’s nothing mounted from it you care about. If you want to be safer, point --filename at a large file on a mounted filesystem instead.
While that’s running, in a second terminal:
watch -n 1 'sudo nvme smart-log /dev/nvme0 | grep -i temp'If your drive throttles, you’ll see the write bandwidth in fio drop noticeably partway through the test, often around the 15 to 30 second mark, while the temperature reading climbs. That’s your confirmation. You have a problem. Time to buy metal.
The Heatsink Spectrum: Ranked by How Much They Actually Help
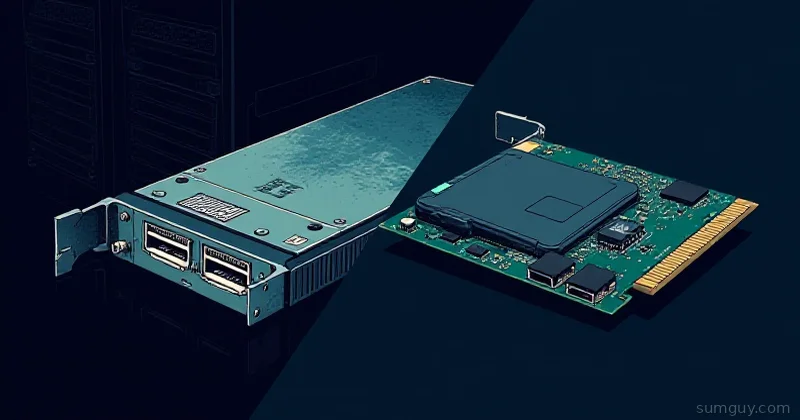
Bare Drive in a PCIe Adapter Card
This is the “I found an M.2 adapter on AliExpress for $4” situation. The drive sits in a plastic slot or bare PCB, exposed to whatever ambient air happens to drift past it. In a well-ventilated case with good airflow, this can be surprisingly okay for light workloads. In a hot server chassis, a cramped mini-ITX build, or a Proxmox host doing backup jobs at 3 AM, you’re running on luck.
Verdict: Don’t. Or at minimum, monitor obsessively.
Stock Motherboard Heatsink
Newer motherboards (anything mid-range or better from the last couple of years) ship with an M.2 heatsink, usually a finned aluminum plate that sandwiches the drive. These are actually pretty decent if you use them correctly, which means installing the thermal pad that came in the bag. Yes, that bag you threw in the junk drawer.
The pad goes between the drive and the heatsink. Without it, you’ve got an air gap and you’re basically just decorating your drive with aluminum. Most stock thermal pads are mediocre 6 W/mK silicone pads, but they’re better than nothing.
On a B650 or Z790 board with decent case airflow, the stock heatsink will typically keep a PCIe 4.0 drive in the 50 to 65°C range under sustained load. Good enough for most home lab use.
Verdict: Use it. Install the thermal pad.
Aftermarket Finned Heatsinks
This is the sweet spot for most people. You’re spending $10 to 25 and getting meaningfully better cooling than stock.
A few worth knowing:
Thermalright HR-09, Probably the most recommended in the NVMe heatsink world right now. Aggressive fin stack, high surface area, excellent thermal pad included. Available in single-sided and dual-sided variants. The dual-sided version also contacts the bottom of the drive, which matters more than many people realize. (I’ll explain why in a moment.) Runs about $12 to 18.
Sabrent Rocket Heatsink, Sabrent makes decent drives and their heatsink is solid. Double-sided, reasonable thermal pads, doesn’t look ridiculous. Around $15.
Be Quiet! MC1 Pro, If you’re already running a Be Quiet! case and you want the aesthetic to match, this is the one. It’s also genuinely effective, not just pretty. Thicker profile, good pad, around $20 to 25.
In reality, any of these will knock 10 to 20°C off your sustained-load temps compared to a bare drive. On a PCIe 4.0 drive in a decently ventilated case, you’re looking at 55 to 65°C peak instead of 75 to 85°C. That’s the difference between throttling and not throttling.
Verdict: This is where most home lab builds should land.
The Thermal Pad Bottom Thing (Don’t Skip This)
Here’s what most people get wrong: they slap a heatsink on the top of the drive and call it done. But on a lot of modern NVMe drives, especially PCIe 4.0 and 5.0 drives, the controller chip is on the bottom of the PCB, not the top. The top has the NAND flash. The bottom has the thing that generates the most heat.
If your heatsink only covers the top, you’re cooling the NAND and leaving the controller to cook against your motherboard.
Check your drive’s datasheet or a teardown photo if you’re not sure. For dual-sided heatsinks (Thermalright HR-09 2280, for example), this is handled, you get pads on both sides. For single-sided heatsinks, you might need to add a thin thermal pad between the bottom of the drive and the M.2 slot retention plate or motherboard PCB. A generic 1mm silicone thermal pad does the job.
This single change can drop temperatures 5 to 8°C on affected drives. It’s a $3 fix.
Active Fan Heatsinks
These exist. Products like the Icy Box IB-M2HSF-702 and Glotrends active M.2 coolers bolt a tiny fan onto an aluminum heatsink. The fan spins. The drive stays cool. Temps under sustained load can stay in the 40 to 50°C range even on a PCIe 5.0 drive.
Is this overkill? For a typical home lab workstation or desktop, yes, absolutely. Your case fans are doing enough work if your airflow is halfway decent.
But there’s a real use case: servers with no airflow over the M.2 slot. If you’ve got a Dell R720, a Supermicro box, or any aging 1U/2U that was designed before M.2 slots existed, and you’ve added an M.2 drive via a PCIe adapter card, that drive might be sitting in dead air. The server fans are pointed at the CPUs and RAM. Your NVMe might as well be in a cardboard box. An active cooler in that situation goes from “nice to have” to “this drive will survive the weekend.”
Verdict: Niche use case, but the right tool when your airflow situation is genuinely bad.
PCIe Adapter Cards With Integrated Heatsinks
This one deserves more attention than it gets. Cards like the ASUS Hyper M.2 X16 Gen 5 and the ASRock Hyper Quad M.2 Card do two things: they let you run M.2 drives in a PCIe slot (useful for adding storage beyond your motherboard’s onboard slots), and they come with proper heatsinks, finned aluminum covers over each drive slot.
The big advantage isn’t just the heatsink. It’s slot airflow. When a PCIe card sits in an expansion slot, it’s sitting in the middle of your case’s horizontal airflow path, or directly in front of a case fan. Air that never reached your top-of-motherboard M.2 slot is now blowing right across your drives.
This combo (solid finned heatsink plus actual airflow) can outperform a premium aftermarket heatsink on a poorly ventilated motherboard M.2 slot. If you’re adding M.2 drives to a server or tower and you have open PCIe slots, this approach is worth a serious look.
Verdict: Underrated. Especially in home lab towers and rack-mounted systems with open PCIe slots.
RGB Heatsinks
There are heatsinks with LEDs in them. They glow. They are, without exception, prioritizing aesthetics over fin surface area. The RGB controller adds heat. The diffuser obscures fin density. You are paying extra for a product that is thermally worse than its non-RGB sibling.
I’m not going to name the brands because the category itself is the problem. If you’re building a content-creation rig and you want your M.2 to match your RAM and GPU lighting, okay, live your life. But you asked about cooling. The answer is: RGB heatsinks cool your drive less effectively than comparable non-RGB options at the same price point.
Verdict: Decorative. Not recommended for anything resembling a workload.
Airflow First, Heatsink Second
A $12 finned heatsink in a well-ventilated case will outperform a $30 premium heatsink in a case with three intake fans and no exhaust. Heat has to go somewhere, and a heatsink just gives that heat more surface area to transfer from. If there’s no airflow to carry the heat away, you’re just spreading it around more efficiently.
Before you buy anything:
-
Check your case fan configuration. Ideally: front/bottom intakes, rear/top exhaust. The M.2 slot should be in the path of airflow, not in a dead corner.
-
Route cables away from the M.2 area. A bundle of SATA cables sitting over your M.2 drive is a heat trap. Move them.
-
Check slot placement on your motherboard. Many boards have M.2 slots under the GPU: which blocks airflow. If your board has a slot above the GPU or at the edge, that’s usually better thermally.
A heatsink without airflow is decoration. Airflow without a heatsink is usually enough. Both together is just correct.
What About Enterprise U.2 / U.3 Drives?
If you’re running actual enterprise hardware, datacenter SSDs in U.2 or U.3 form factor (the ones with the chunky connector, looks like a SATA drive had a baby with an SFP port), thermal management is handled differently.
U.2/U.3 drives have their own metal housing, often with direct contact to the drive bay’s backplane, which acts as a heatsink. Drives like the Intel P5520, Samsung PM9A3, or Micron 7450 are designed to run in a server chassis with forced airflow from the front fans. They’re spec’d to operate at sustained workloads in 55°C ambient. The enclosure and server airflow are doing the cooling work.
If you’re using U.2 drives in a home lab server (good taste, honestly), make sure the server’s front fans are functional and you’re not running it with the side panel off on a shelf. These drives expect the airflow the chassis provides.
The Bottom Line
Thermal throttling is real, it’s quiet, and it’s costing you write performance you’re already paying for. Here’s the quick decision tree:
You’ve never checked your NVMe temp → Run nvme smart-log right now. If it’s above 60°C at idle, act.
You have a PCIe 4.0 drive with the stock motherboard heatsink → Make sure the thermal pad is installed. If temps are still above 70°C under load, add an aftermarket finned heatsink.
You have a PCIe 5.0 drive → You need a heatsink. No exceptions. These things run hot from the factory and throttle fast.
You’re in a server or case with bad M.2 airflow → Active cooler or PCIe adapter card with integrated heatsink plus slot airflow. Don’t waste money on passive fins in dead air.
You’re considering an RGB heatsink → I’m not going to stop you. But now you know.
The Thermalright HR-09 dual-sided is the boring correct answer for most home lab setups. It’s cheap, it works, it ships thermal pads that are actually decent. Add it to your next parts order alongside your M.2 drive and stop wondering why your benchmarks drop off after 30 seconds.
Your 3 AM backup jobs will complete at full speed. Your drive will last longer. And you’ll have one fewer mystery to debug at the worst possible time.