You’re Typing docker ps Too Much
You don’t need to memorize flag combinations for tools you use daily. That’s what TUI wrappers are for. They’re the difference between hunting for documentation and just… knowing where the button is.
I’m talking about lazygit, lazydocker, and lazysql, three terminal UI tools that sit between you and the CLI and ask the simple question: “What if you didn’t have to remember everything?”
This isn’t about abandoning the command line. It’s about being smarter about when to use a wrapper instead. And honestly, once you’ve got the keybinds muscle-memoried, you’ll be faster than someone alt-tabbing through docs.
lazygit: Stop Fighting with Git
lazygit is a git wrapper for people who’ve memorized way too many flag combinations and then forgotten them at 3 AM when you’re rebasing a branch you shouldn’t have created.
Install lazygit
# macOSbrew install lazygit
# Linux (Arch)pacman -S lazygit
# Linux (Debian/Ubuntu)LAZYGIT_VERSION=$(curl -s "https://api.github.com/repos/jesseduffield/lazygit/releases/latest" | grep -Po '"tag_name": "v\K[0-9.]+')curl -Lo lazygit.tar.gz "https://github.com/jesseduffield/lazygit/releases/latest/download/lazygit_${LAZYGIT_VERSION}_Linux_x86_64.tar.gz"tar xf lazygit.tar.gz lazygitsudo install lazygit /usr/local/bin
Start it: lazygit from any git repo.
The Workflow
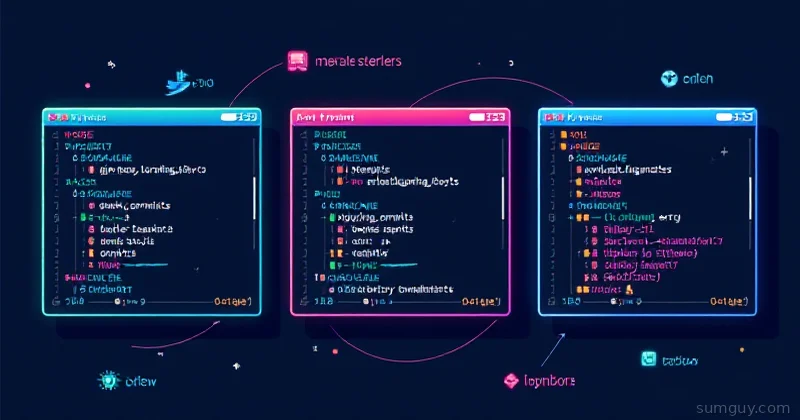
You land in a UI with five panels: branches, commits, files, stash, and the main log. It sounds crowded, but it’s not. Everything you need is visible at once.
Key keybinds:
j/k: move down/up (vim-style, because of course)l/h: move right/left between panelsTab: cycle through panelsSpace: stage/unstage a file, or check out a branch/commit (context-dependent: on a commit this detaches HEAD, so know where you’re pointing)c: commitP: pushp: pulln: new branchd: discard changess: stash changesS: view stash options (pop, apply, and more)?: help (seriously, press it, the in-app help is good)
The genius part: in the commits panel you just act on commits directly. Highlight one and press s to squash it into the one below, f to fixup (squash but drop the message), e to edit, r to reword, d to drop. Reorder commits with Ctrl+j/Ctrl+k. Then bring up the rebase options menu with m and continue. No rebase -i nonsense, no counting commits, no editing a pick/squash/reword todo file by hand.
Real Workflow: Cleanup Before Pushing
You’ve been committing like you’ve got unlimited storage. Four commits that should be one. A debug print you forgot to remove.
lazygit- Go to the commits panel, navigate to the commits you want to combine
- Use
Ctrl+j/Ctrl+kto move your scattered commits together - Highlight a commit and press
sto squash it into the one below (repeat for each) - Press
m→ continue, to wrap up the rebase - Done
Compare that to: git rebase -i origin/main, manually editing the file, understanding pick/squash syntax, running git push --force-with-lease, and praying.
One keybind combo beats one hour of StackOverflow tabs.
lazydocker: Containers Without the Flag Parade
lazydocker does for Docker what lazygit does for git. You stop living in docker ps | grep territory and start actually seeing your infrastructure.
Install lazydocker
# macOSbrew install lazydocker
# Linuxcurl https://raw.githubusercontent.com/jesseduffield/lazydocker/master/scripts/install_update_linux.sh | bash
Start it: lazydocker.
The Workflow
You get a TUI with containers on the left, images below them, and logs/stats on the right. That’s it. No hunting for container IDs. No docker logs -f --tail 100 <container-id-that-you-had-to-copy>.
Key keybinds:
j/k: move down/uph/l: focus left/right panelsSpace: select containerE: exec into container (opens a shell prompt, type/bin/bashor/bin/sh)m: view logs (follows them by default)s: stop containerd: delete containerr: restart containere: hide/show stopped containers/: filter containers by name (type to search, Esc to clear)?: help
Real Workflow: Debug a Misbehaving Container
Your app is spitting errors. You need logs, you need to check env vars, you need to verify a config file exists.
lazydocker/→ type your container name- Hit Enter, container is selected
m: instant logs, scrollableE→/bin/bash: you’re inside the containercat /app/config.yml: check your configenv | grep API: check env varsexit: back to the TUICtrl+c: quit
That’s one workflow. No docker IDs, no juggling multiple terminal windows, no docker inspect <id> | jq '.Config.Env'.
The logs panel alone is worth the install. No more docker logs <id> | tail -100 | grep ERROR. Just l and scroll.
lazysql: SQL Without Memorizing Schemas
lazysql is a TUI for databases. It speaks Postgres, MySQL, SQLite, and MSSQL. You navigate your schema, run queries, see results, all in the terminal. No more psql fumbling or opening a GUI tool that wants to install 500 MB of dependencies.
Install lazysql
# macOS/Linuxbrew install lazysql
# Requires Go 1.23+go install github.com/jorgerojas26/lazysql@latest
# Or pre-built binariescurl -L https://github.com/jorgerojas26/lazysql/releases/latest | grep -o 'href="[^"]*lazysql.*linux.*64[^"]*"' | head -1 | cut -d'"' -f2 | xargs curl -Lo lazysqlchmod +x lazysqlsudo mv lazysql /usr/local/bin
Start it: lazysql (it’ll prompt for connection details) or pass a connection URL directly, like lazysql postgres://user:pass@localhost/dbname or lazysql mysql://user:pass@localhost/dbname.
For SQLite: lazysql /path/to/database.db
The Workflow
Left panel shows your tables and views. Center shows your current table data. Right shows query results. Column headers are always visible. Pagination is built in.
Key keybinds:
j/k: move down/up rowsH/L: focus the tree/table panels/: search tablesSpace: select rowd: delete selected rows (asks for confirmation)o: new row (opens editor)c: edit cell (modal appears)Ctrl+E: open the SQL editor,Ctrl+Rto run the query?: help
Real Workflow: Debug a Data Issue
Your app is showing wrong data in production. You need to check if it’s a DB corruption or app logic.
lazysql(connect to prod Postgres)/→ type table name → navigate to the problematic table- See 50 rows at a time, scrollable
Ctrl+E→ write a custom query, thenCtrl+Rto run it:
SELECT id, created_at, status FROM orders WHERE user_id = 12345 ORDER BY created_at DESC LIMIT 20;- Results appear in the right pane, copy-pasteable
- Find the corrupt record,
cto edit the cell directly, orCtrl+E/Ctrl+Rto run a corrective UPDATE
No opening psql, no struggling with connection strings, no copy-pasting IDs into your terminal. The data is right there.
When TUI > CLI: The Decision Tree
This is important: TUI wrappers aren’t always the answer.
Use the TUI when:
- You’re exploring (browsing tables, checking commit history, looking at logs)
- You’re doing one-off operations (staging files, restarting containers)
- You need visual context (seeing all your branches, all your containers at once)
- You can’t remember flags (which is fair, we’re all human)
Use raw CLI when:
- You’re scripting or automating something
- You need to pipe data to another tool
- You’re in a script and don’t have interactive terminal access
- You’re setting up CI/CD and need repeatable commands
Real example: You’re writing an Ansible playbook that needs to restart a Docker container. You don’t lazydocker in your playbook. You docker restart <name>. But when you’re debugging why the container failed, you lazydocker to check logs and stats.
Keybind Muscle Memory: How You Get Fast
Here’s the secret nobody talks about: the first time you use these tools, you’ll forget half the keybinds. The second time, you’ll remember 70%. By day five, your fingers will move without thinking.
The speed-up comes from your brain not having to switch contexts, not from the tools being fast. You don’t leave the editor to Google git rebase flags. You don’t leave the terminal to open Sequel Pro. You don’t open StackOverflow to remember if it’s docker stop or docker kill.
Pin the help (?) key. Use it liberally. Most people don’t realize these tools have built-in help that’s actually good. Not a man page you have to parse, just a list of keybinds for your current view.
Making It Habitual: Add Aliases
This is dumb but it works. I have these in my shell config:
alias lg='lazygit'alias ld='lazydocker'alias lsql='lazysql'Now when I open a terminal, muscle memory takes over. lg, enter, and I’m managing git interactively. ld, enter, and I’m checking container logs. It’s 20 keystrokes shorter per invocation, and it compounds.
Worth Your Time or Bloatware?
These tools add ~50 MB to your system combined (binaries + dependencies). In 2026, that’s… nothing. A single Docker image is bigger.
The real question: do you use git, Docker, or SQL databases regularly? If yes, one of these will save you hours per month. Not “five minutes on a Tuesday.” Hours. The logistical overhead of hunting for flags, copy-pasting IDs, remembering which docker ps column is the container name; it adds up.
Your future self at 2 AM, trying to debug why a deployment went sideways, will thank you.
Next Moves
- Install one. Probably lazygit if you commit code daily.
- Open help with
?and spend five minutes reading keybinds. - Use it for one real task. Don’t read tutorials; just fumble through.
- The muscle memory happens after three or four uses.
- Alias it so you default to the TUI over raw CLI.
That’s it. No YouTube tutorials, no 30-minute setup guides. Install, use, muscle-memory wins.
You’ve got 50 terminals open and a cup of cold coffee. Make your terminal time count.