Your Motion Sensor Is Lying to You
You spent an afternoon mounting motion sensors. You tuned the timeouts. You built the perfect “lights follow me around the house” automation. And then your spouse sat down on the couch to watch TV, went completely still, and got plunged into darkness mid-episode.
Motion sensors detect movement, not presence. That’s the dirty secret nobody tells you when you’re buying a bag of PIR sensors off Amazon.
The workarounds are ugly. You can crank the timeout to 10 minutes, now the lights stay on for 10 minutes after you leave a room. You can add a mmWave radar sensor (they’re better, but still single-room, still line-of-sight, still ~$20 to 40 each). Or you can go full presence detection and actually know which room each person is in, right now, at all times.
That last option is ESPresense. It’s not plug-and-play. It will require you to solder nothing, flash some firmware, configure MQTT, and think carefully about Bluetooth physics. But when it works, it works, and your automations become genuinely context-aware instead of just motion-reactive.
How ESPresense Actually Works
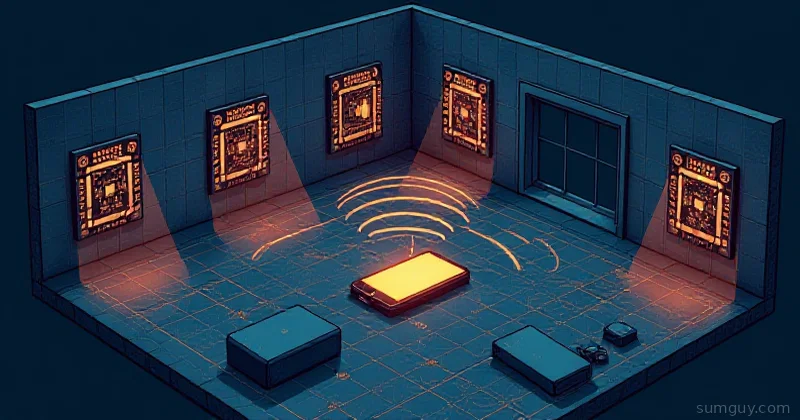
The pitch: every room gets a cheap ESP32 node that listens for Bluetooth Low Energy (BLE) advertisements. Your phone (or a small iBeacon tracker) constantly broadcasts BLE. Each node picks up that signal and reports its received signal strength (RSSI). RSSI drops with distance, so stronger signal = closer device. With nodes in multiple rooms, Home Assistant can run trilateration to figure out which room has the strongest signal, and call that your location.
That’s the theory. Reality is messier (walls, metal, human bodies absorb RF), but ESPresense has spent years building calibration tools and filtering logic to make it practical.
The stack:
- ESP32 nodes: one per room, powered by USB, running ESPresense firmware
- MQTT broker: Mosquitto in HA, or standalone; nodes publish distance estimates
- ESPresense integration: HA add-on that subscribes to MQTT and runs the room logic
- Beacon: your phone with an app, a Tile tracker, or a dedicated iBeacon
Hardware You Need
The ESP32 Nodes
Any ESP32 works. The $4 boards from AliExpress are fine for testing. For production use, the ESP32-S3 with an external antenna connector is worth the extra few dollars, the external antenna makes a real difference through interior walls and in larger rooms.
Recommended boards:
- ESP32-WROOM-32: the classic, cheap, works everywhere
- ESP32-S3 with IPEX connector + 2.4GHz external antenna: better range, worth it for rooms with walls in the way
- M5Stack ATOM Lite: tiny, USB-C, easy to hide behind furniture
You want one node per room you care about. A 3-bedroom apartment with living room, kitchen, and home office needs 6 to 7 nodes if you want good coverage. Each room’s node is the “anchor”, it reports how far away your beacon is.
Power: any USB-A power brick works. These boards draw <200mA idle.
The Beacon
This is what your ESP32 nodes track. Options:
Your phone, iOS and Android both work, but with caveats. Install the ESPresense Companion app (Android) or use Home Assistant Companion with BLE advertising enabled. iPhones randomize their MAC address constantly (Bluetooth privacy feature), so ESPresense uses the IRK (Identity Resolving Key) to track through the randomization. It works, but setup is slightly more involved.
Tile / AirTag alternatives, Tile trackers broadcast a stable BLE signal. Cheap, small, clip to your keychain or pet’s collar. Battery lasts 6 to 12 months. No setup beyond sticking them on things.
Dedicated iBeacon, small BLE-only devices that do nothing but broadcast. ~$5 to 15 each, USB or coin cell powered.
For people tracking (rather than asset tracking), phones are the right call. For pets or finding the TV remote, use a Tile.
Flashing the Firmware
ESPresense has a web-based flash tool. No esptool.py, no compiling, no suffering.
- Plug your ESP32 into a USB port on a Chrome or Edge browser machine
- Go to espresense.com/firmware
- Select your board variant, click Flash
- The browser serial interface handles the rest
After flashing, the node broadcasts a captive portal WiFi network. Connect to it, enter your WiFi credentials and MQTT broker details, save. Done. The node will reboot and start publishing to MQTT within 30 seconds.
MQTT Topic Structure
ESPresense publishes to a predictable topic hierarchy:
espresense/devices/<device_id>/<node_name>Where <device_id> is the beacon identifier and <node_name> is the room name you configured on each node. The payload is JSON:
{ "id": "irk:abc123def456", "name": "kingpin-phone", "rssi": -67, "distance": 2.4, "speed": 0.1, "confidence": 9, "mac": "aa:bb:cc:dd:ee:ff"}The distance field is the filtered distance estimate in meters. confidence is 0 to 10, you’ll want >5 before trusting a reading for automations.
To see what’s being published, run:
mosquitto_sub -h your-mqtt-broker -t "espresense/#" -vYou’ll see a firehose of BLE devices your nodes are picking up, neighbors’ phones, random IoT gear, your own devices. ESPresense lets you configure which device IDs to track so you’re not ingesting noise from every passerby.
Home Assistant Integration
Install the ESPresense integration from HACS (or the official add-on if you’re running HA OS).
Add-on config (HA OS)
mqtt:  host: core-mosquitto  port: 1883  username: homeassistant  password: your_mqtt_password
floors:  - id: ground    name: Ground Floor
rooms:  - id: living_room    name: Living Room    floor: ground    points:      - x: 0        y: 0        z: 0  # node position in meters from a reference corner
  - id: kitchen    name: Kitchen    floor: ground    points:      - x: 5        y: 0        z: 0
  - id: office    name: Office    floor: ground    points:      - x: 0        y: 4        z: 0
devices:  - id: irk:your_phone_irk_here    name: kingpin
The points coordinates are where each node is physically located in your floor plan. Measure in meters from one corner. This is what enables trilateration, the integration uses these positions plus the distance estimates from each node to calculate where you actually are.
ESPresense Node Config (via Web UI)
Each node has a web UI at its IP address. Key settings:
[mqtt]host = 192.168.1.10port = 1883user = homeassistantpassword = your_password
[room]name = living_room      # must match your HA config room id
[scanning]active = false          # passive scanning — don't disturb BLE devicesduration = 1000         # scan window in ms
Set active = false unless you have a specific reason not to. Active scanning sends probe requests, which can interact badly with some BLE devices and drains phone batteries faster.
Calibration: The Part Nobody Warns You About
Here’s the honest truth: raw RSSI → distance is garbage. The relationship between signal strength and distance is affected by:
- Walls, floors, furniture (metal is the worst)
- Human bodies (you’re a bag of water, water absorbs RF)
- Antenna orientation on both the ESP32 and your phone
- Other 2.4GHz traffic (WiFi, microwave ovens)
ESPresense handles this with per-device calibration. Each node has a “reference RSSI at 1m” value called rxRefRssi. You calibrate it by standing 1 meter from the node with your beacon and checking what RSSI the node reports.
In the ESPresense web UI, go to Calibration and click Calibrate while holding your beacon 1 meter from the node. Do this for every node. Takes 5 minutes total and dramatically improves accuracy.
After calibration, the distance estimates should be within 0.5 to 1.5 meters of reality in a typical room. That’s good enough to distinguish “in the living room” from “in the kitchen”, which is all you need.
The integration also applies a Kalman filter to smooth out the noisy RSSI readings. You can tune the filter aggressiveness:
devices: - id: irk:your_phone_irk_here name: kingpin rssiF: 0.1 # lower = smoother but slower to respond distF: 0.05 # distance filter, same tradeoffStart with the defaults. Only tune if you’re seeing your location flip between rooms too frequently (increase smoothing) or too slowly (decrease it).
Real Automation: The Whole Point
Here’s the automation that makes ESPresense worth setting up, lights that follow you by room, with a lux check so they don’t fire in daylight:
alias: "Room presence lighting"description: "Turn on lights when person enters room, lux is low"trigger:  - platform: state    entity_id: sensor.kingpin_room    to: living_room  - platform: state    entity_id: sensor.kingpin_room    to: kitchen  - platform: state    entity_id: sensor.kingpin_room    to: office
condition:  - condition: numeric_state    entity_id: sensor.outdoor_lux    below: 100
action:  - variables:      room: "{{ trigger.to_state.state }}"  - choose:      - conditions:          - condition: template            value_template: "{{ room == 'living_room' }}"        sequence:          - service: light.turn_on            target:              entity_id: light.living_room            data:              brightness_pct: 80      - conditions:          - condition: template            value_template: "{{ room == 'kitchen' }}"        sequence:          - service: light.turn_on            target:              entity_id: light.kitchen            data:              brightness_pct: 100      - conditions:          - condition: template            value_template: "{{ room == 'office' }}"        sequence:          - service: light.turn_on            target:              entity_id: light.office            data:              brightness_pct: 60mode: queued
And the “turn off when you leave” side:
alias: "Room presence lights off"trigger: - platform: state entity_id: sensor.kingpin_room from: living_room for: seconds: 30 # grace period — brief room exits don't kill the lightsaction: - service: light.turn_off target: entity_id: light.living_roomThe 30-second for: grace period is critical. Without it, walking to the kitchen to grab a drink turns off your living room lights. Your spouse will not appreciate this.
ESPresense vs. Bermuda vs. room-assistant
You’ll see a few names when researching BLE presence for HA. Here’s the quick breakdown:
ESPresense, dedicated firmware for ESP32, MQTT-based, purpose-built for presence. Best calibration tools, most mature. Requires separate hardware from your HA instance.
Bermuda, HACS integration that uses HA’s built-in Bluetooth proxy feature (ESP32 running ESPHome with BT proxy role). Simpler setup if you’re already running ESPHome, but the BT proxy approach has limitations, distance estimation is less refined than ESPresense’s dedicated firmware.
room-assistant, older Node.js project, runs on Raspberry Pis, BLE + GPIO. More flexible but way more complex to set up and maintain. Not recommended for new installs.
If you’re starting fresh, ESPresense is the right call for reliability and accuracy. If you’re already deep in ESPHome and just want basic room detection, give Bermuda a look first, it might be enough without dedicated hardware.
Real Limitations (Don’t Skip This Section)
iPhone Bluetooth privacy is the main headache. iOS randomizes the BLE MAC address roughly every 15 minutes, making device tracking unreliable unless you use the IRK-based approach. Getting the IRK requires either the ESPresense Companion app (Android) or some phone-specific setup for iOS. Doable, but not instant.
Battery beacons die. Tile batteries last 6 to 12 months. If you’re tracking pets or assets, build a reminder to check batteries or you’ll spend an afternoon wondering why the cat appears to be “away.”
Walls and materials matter more than you think. A poured concrete wall will absolutely eat your BLE signal. Metal studs, refrigerators, and large appliances all interfere. If you have a room that’s particularly bad, adding a second node on the other side of the problem material helps.
Distance estimation is probabilistic, not exact. You’re not getting centimeter accuracy. You’re getting “probably in this room” accuracy, which is 80 to 90% reliable after calibration. For most automations, that’s fine. For “is the person within 50cm of this specific chair”, no, BLE can’t do that.
ESP32 node reboots. Power glitches happen. Put your nodes on UPS outlets or power strips on your main circuit, not extension cords that get unplugged.
The Bottom Line
ESPresense turns your home automation from “motion-reactive” to “context-aware.” $4 ESP32 boards, free firmware, and an afternoon of setup gets you room-level presence that can power automations your PIR sensors simply can’t.
Is it plug-and-play? No. You’ll spend time with MQTT topics, calibration, and floor plan coordinates. But the payoff is real: your lights know which room you’re in, your spouse stops getting plunged into darkness mid-episode, and you stop explaining to guests why smart home lights are actually worse than dumb switches.
Flash the firmware. Measure your rooms. Calibrate each node. The 2 AM debugging session when you realize your kitchen node is getting interference from the refrigerator compressor is a rite of passage. You’ll get through it.